
Sushezi Instructions
June 27 2022 – Jess McDowell

Making Your Sushi
1. Open your Sushezi and lightly oil the inside. Wet your hands to help handle the rice better. Make sure the plunger rod is sitting in the screw thread position. Pack 1⁄2 cup of Sushi rice mixture into one half of the Sushezi and repeat with another 1⁄2 cup into the other half. Again make sure the plunger rod is in the screw thread position.
2. Lift out the plunger rod and lay it in the centre of one half of the rice. Press firmly down making sure that the end plate is in position at the screw thread end. Repeat for the other half. This will provide a neat, straight groove.

3. Replace the plunger into the thread end in the screw channel with the end plate against the end of the thread. Lay your ingredients into the grooves.
4. Gently close the two halves together, starting at a 45o angle.

5. Clip the latches shut. Fit the end cap by lining up the marks and make sure it is secure by twisting to lock into place.
6. Hold the Sushezi in one hand and turn the plunger knob until the mark on the rod is reached (approx. 5 full turns). This will compress the rice mixture to the right consistency.
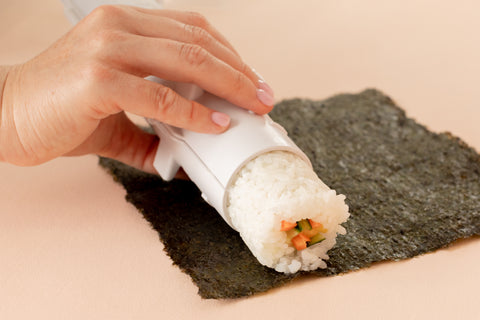
7. Twist the end cap to unlock and remove the cap. On a flat surface, place a nori sheet glossy side face down with the longest edge closest to you. Take the Sushezi in one hand. Push the plunger right through. Position the newly formed rice roll on to the nori sheet.
8. Roll up the nori sheet. Wet the nori sheet at the joining end with a little water to ensure that the overlap sticks.

9. To allow the nori sheet to soften, leave for 15 minutes before slicing. Moisten the blade of a sharp knife with water. Slice through. Wipe the blade of the knife clean and moisten after each cut.
www.sushezi.com
Email: sales@sushezi.com